
How To Fix Exhaust Flange Leak
How To Fix Exhaust Flange Leak For many everyday drivers, car intricacies may not hold their attention until an unexpected issue emerges. This pattern can be risky, as seemingly minor problems can snowball into major concerns. This article focuses on addressing one specific problem: how to effectively fix an exhaust flange leak. Exhaust system malfunctions often go unnoticed due to concealed leaks and muted internal sounds, making this repair crucial for your vehicle’s longevity.
Decoding the Exhaust Flange and Its Operation

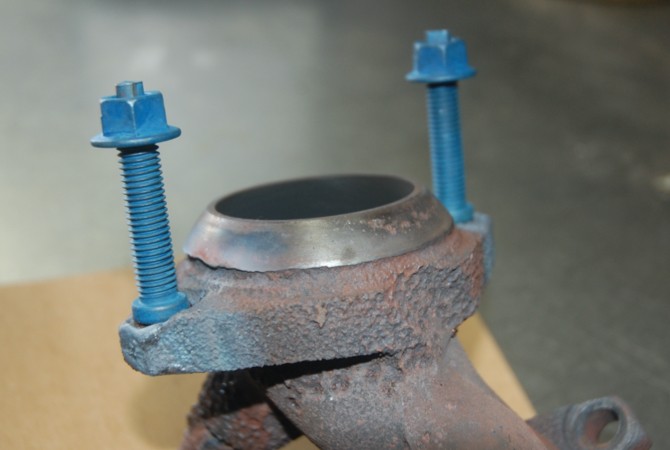
An exhaust flange comprises two small metal segments that connect exhaust pipes within the inner framework of the exhaust system. These segments encompass metal bands secured by 2 to 4 bolts, forming a seal via an exhaust gasket to avert leakage between metal pipes. 10mm bolts are commonly utilized for 2-bolt flanges, while 8mm bolts serve 3-bolt flanges within a ball-type socket. The bolts exhibit a minimum tensile strength of 8.8 to resist stretching or cracking, sometimes aided by spring washers, Loctite, or locking nuts to dampen vibrations.
Exhaust flanges are present in various exhaust configurations, including exhaust manifolds and tubular headers. They serve as a donut-shaped gasket, containing exhaust noise, heat, and emissions. Certain flange bolts are equipped with heavy coil springs, preserving pressure equilibrium if other bolts loosen. A leak in the exhaust flange necessitates prompt replacement, indicating a compromised ability to withstand extreme temperatures. Typically, these flanges degrade over 2 to 3 years, influenced by driving practices such as frequent acceleration or prolonged idling. But how do you fix an exhaust leak at the flange?
Indications of an Exhaust Flange Leak

Initiating the engine and letting it run for a minute is an effective method to identify exhaust leaks. Watch out for the following signs during this process:
- Unusual Noise: Defective flanges generate distinct and unfamiliar noises, distinguishable from other vehicle components. Alongside metallic clatters, you’ll detect hissing or tapping sounds of escaping fluids from within the system. These sounds intensify as your speed increases, particularly on rough surfaces, occasionally magnified by louder exhaust systems.
- Fuel Inefficiency: Several factors contribute to fuel inefficiency, and an exhaust leak is among them. Constant fluid leaks force the engine to exert more effort compensating for the loss, leading to heightened fuel consumption compared to the vehicle’s factory condition.
- Foul Odors from Exhaust: An additional indicator of leakage is the scent emitted from the exhaust. Instead of dissipating rearwards, you’ll observe a surge of fumes upon engine ignition, accompanied by the fragrance of nitrogen and dust. Occasionally, debris may accumulate within mid pipes, combusting under extreme heat, yielding a burning plastic or wood-like aroma.
- Lowered Exhaust Pipe: If your exhaust pipe sits lower than usual, it’s likely due to loosened bolts or a corroded flange that has started to leak. Driving with a lowered exhaust pipe poses danger, as it could detach unexpectedly, potentially causing accidents involving other drivers.
Read More : How Does An Exhaust Brake Work
Root Causes of Flange Leakage

Understanding the culprits behind flange leaks can aid in prevention:
- Heat Cycles: The engine bay contains a certain level of moisture and vapor. Flange leaks often result from the effects of high temperatures generated by 4-5 heat cycles. These cycles lead to water evaporation from within the exhaust system and vapor release to the environment. Cold or rainy conditions decrease evaporation rates, trapping water inside the exhaust. Extreme heat then boils the trapped water, stretching the moist exhaust flanges and creating cracks. Debris can lodge within these cracks, exacerbating the issue.
- Corrosion: Over 2 to 3 years of driving, iron undergoes a chemical reaction with carbon monoxide, water, and heat, forming iron oxide, or rust. Corrosion poses a significant threat to exhaust systems. Humid climates and muddy terrains escalate corrosion, especially when trapped moisture takes on a liquid form, accelerating rust.
Steps to Rectify Exhaust Flange Leaks
Fixing exhaust leaks at the flange is crucial, and if you can’t consult a professional, follow these steps:
- Engine Shutdown: When abnormal noises or odors emanate from the exhaust system, turn off the engine. If on the road, ensure a safe stop and allow the car to cool for approximately 30 minutes, as the exhaust pipe can be significantly hotter than the engine.
- Cleaning the Leak: Wear gloves and protective eyewear. Use sandpaper to remove the leak area, and then cleanse it with acetone.
- Sealing the Leak: Depending on the leak’s size, exhaust tape can provide a quick solution. For larger gaps, replacing the exhaust flange becomes necessary.
- Inspecting the Pipe: Identify the leak’s location within the pipes. The front pipe connects via a gasket to the exhaust manifold flange, while the rear pipe joins the exhaust pipe.
- Bolt and Screw Removal: Unfasten all bolts and screws using a ratchet or wrench, excluding those on the header’s sides. A flashlight can assist if visibility is limited.
- Flange Separation: Employ a hanger to support the exhaust pipe, preventing detachment while replacing the flange. Disassemble manifold and tube connections as well.
- Cleaning the Flange Connector: Eliminate any residue from the surface using a clean cloth. For rust, use sandpaper to eliminate corrosion and unclog the converter, enhancing fuel efficiency.
- Old Flange Removal: If the old flange is wedged between metal pipes, use a sharp metal piece or a knife to dislodge it. Remove interior debris and apply sealant to both sides of the gasket before installing the new flange.
- New Flange Installation: Carefully introduce the new flanges into the system, ensuring that sealant does not overflow.
- Reassembly: Use a ratchet or wrench to reconnect pipes, screws, and bolts, ensuring secure sealing to prevent leaks.
- Engine Check: Start the engine to confirm the absence of leaks. If unusual sounds persist or foul odors persist, your sealing might require further attention.
It’s worth noting that some gaskets demand welding, necessitating professional assistance to rectify exhaust leaks.
Frequently Asked Questions
- Cost of Gasket Replacement: For a quick exhaust tape fix, you may need around $20. If opting for professional replacement, the cost could range between $100 and $400, accounting for service charges and new flanges. Flange prices vary, with budget options costing $2 – $5 and premium ones surpassing $20.
- Safe Driving with Exhaust Leaks: Driving with a leaking exhaust flange is perilous due to toxic emissions, including carbon monoxide, nitrogen oxides, and phosphorus. These can accumulate in your vehicle’s cabin more swiftly than in the surroundings.
- Lifespan of Exhaust Flanges: Inexpensive flanges may endure for 1 to 5 years, while pricier counterparts could last up to 20 years, contingent on driving habits and environmental conditions. Investing heavily in expensive exhaust gaskets isn’t imperative, as some might outlast your car’s projected lifespan.
Read More : How To Clean Chrome Exhaust Tips
Concluding How To Fix Exhaust Flange Leak
With this guide, you’ve gained valuable insight into effectively addressing exhaust flange leaks. While exhaust flanges may seem insignificant, they play a crucial role in safeguarding your vehicle against harmful fumes and contamination. Regular vehicle checks are essential to identifying issues promptly and ensuring a long-lasting, trouble-free driving experience.


